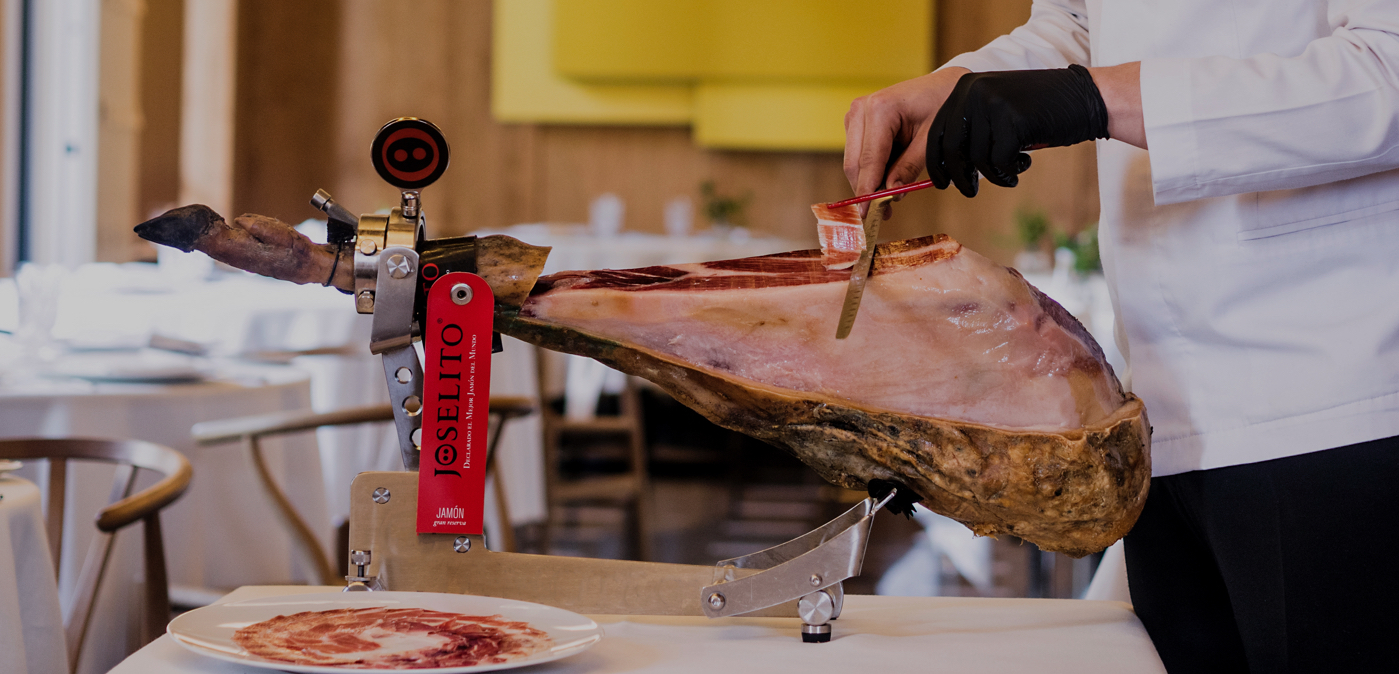
JOSELITO HAM CUT
Cutting Manual
How can we distinguish a Joselito Ham?
Joselito Ham is characterised by its stylised and elongated silhouette. With a thin shank, black hoof,
V-shaped cut and the fluidity of the fat that melts when rubbed with the fingers.
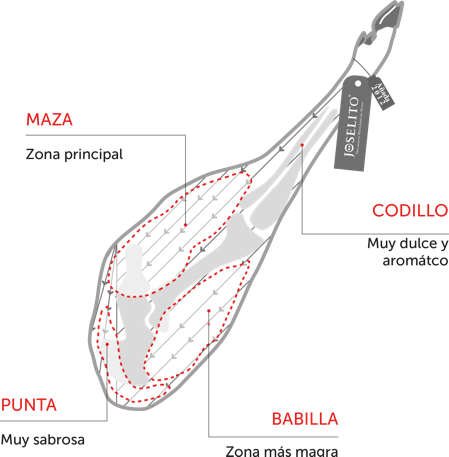
PARTS OF JOSELITO HAM
The ham has four zones with different characteristics.
The maza is the juiciest area with the most meat and is considered the noblest area as it normally has the most fat marbling.
The rump, which is narrower and usually more cured than the maza, is the leanest and least juicy part.
The tip, at the end opposite the hoof, is very tasty and has a considerable fat content.
The knuckle, in the highest part of the maza, has an exquisite flavour, and is very sweet and aromatic
Where should you place the ham stand?
The cutting station must be a clean and safe space where you can work comfortably. The ham stand must be
at the right height at hand level and be perfectly flat and stable.
A ham stand is essential to cut the ham correctly. There are various models and it is important
to find the one that best suits your needs. The most important thing is that it holds the
piece firmly and ensures there is no possibility of displacement.

What do I need to cut Joselito Ham?
The following knives and equipment are needed to cut the ham:
(A) The ham knife, long and flexible, used to extract the slices
(B) A knife with serrated teeth to remove the crust, like a bread knife
(C) A pointed knife, a short, strong knife with a pointed tip, to make precise cuts in the most angular areas and for the important task of separating the ham from the bone.

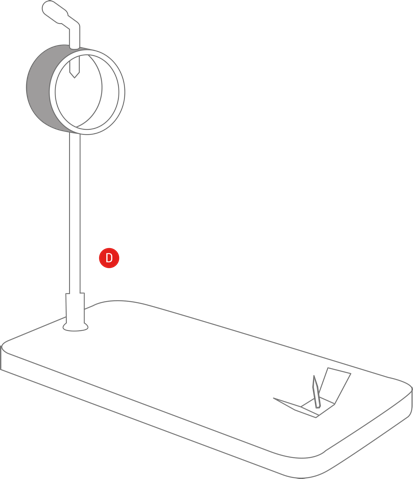
Finally a (D) ham stand. This keeps the ham from slipping. A good ham stand should have a
solid base and an adjustable hoof sleeve to hold the hoof. You will also need a sharpening
steel, which is essential to keep the knives sharp. If you work with the tools in perfect
condition, you will be able to make the cut smoothly and almost effortlessly. For more elegant
presentation, you can also use tongs to pick up the slices and plate them.
It’s time. Let’s start cutting.
BEFORE STARTING
The recommended cutting temperature is approximately 25 °C. In order to best appreciate the organoleptic characteristics of Joselito Ham, the ham must be at this temperature for several days, approximately 2 weeks.
The outside of the ham must first be washed. Wash it with hot water and a scouring sponge and leave it to dry for two days, to have it in the possible best condition for consumption.
WHAT PART DO WE START CUTTING?
The first doubt that arises is the area where we are going to start the piece.
If the Joselito Ham is to be consumed quickly, start with the maza, placing the piece in the stand with the hoof facing upwards. If, on the other hand, you foresee slower consumption, which is what usually happens at home, it is preferable to start with the rump, since this part has less marbled fat and may dry out sooner.


THE CUT
The first step is to make a cut with the serrated knife around the shank, in the narrow part of the ham near the bone. This area is tough and must be cut with decisiveness. Remove the rind by cutting it in the direction of the previous cross-section, doing so in the opposite direction of your hand to avoid cutting yourself. The free hand must always be behind the knife. A metal mesh glove can also be used for added security.
WHAT DO I DO WITH THE FAT I HAVE CUT?
Once the rind of the ham has been removed, the intense yellow outer layers of fat must be removed. Always cut in the direction from the hoof to the hip bone.
Be very careful not to remove the white fat that appears on the inside. The healthy fat in Joselito Ham is also responsible for its wonderful flavour and its combination with the lean meat is essential. This fat is aromatic, tasty, delicately unctuous and healthy.
If the Joselito ham is to be consumed on the same day, you can remove all the skin and fat, leaving the
whole piece perfectly clean and visible. On the other hand, if consumption is going to be slower, only
clean the part that is going to be consumed immediately. This will keep the rest of the ham well
protected and it will not be exposed to the air.
Getting the perfect slice
Now use the ham knife to cut the slices. After the first layer of fat, the lean meat appears, which has
abundant fat marbling.
START CUTTING THROUGH THE MAZA (FATTY MEAT)
We will now use the ham knife to cut the slices. After the first layer of fat, the lean meat appears, which has abundant fat marbling.
The blade of the knife must rest firmly on the ham, making a slow, harmonious back and forth movement, without ever forcing the cut. If the knife is properly sharpened, it will glide easily with light movements, as if you were playing a violin. The free hand is only used to remove the slices once they have been cut, and care must always be taken to keep it above the knife.
 The aim is to get small, thin slices about 4-5 cm long. For full flavour, there should be enough
fat and lean present in all slices.
Make sure that the surface is always flat, perfectly horizontal and without steps or curves. If at any point your cut begins to curve, you should even it out before going any deeper. This will ensure you get the best use of your ham.
From the maza, you can identify the different various by their different colours. Try to obtain slices of the whole surface to mix their flavours.
We will now use the ham knife to cut the slices. After the first layer of fat, the lean meat appears, which has abundant fat marbling.
The blade of the knife must rest firmly on the ham, making a slow, harmonious back and forth movement, without ever forcing the cut. If the knife is properly sharpened, it will glide easily with light movements, as if you were playing a violin. The free hand is only used to remove the slices once they have been cut, and care must always be taken to keep it above the knife.

Make sure that the surface is always flat, perfectly horizontal and without steps or curves. If at any point your cut begins to curve, you should even it out before going any deeper. This will ensure you get the best use of your ham.
From the maza, you can identify the different various by their different colours. Try to obtain slices of the whole surface to mix their flavours.

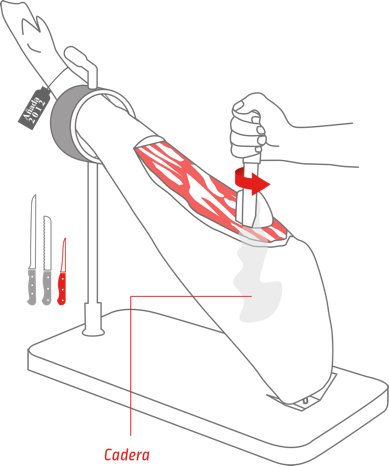
REACHING THE HIP AND FEMUR
WHAT’S NEXT?
When you reach the hip bone, you must make an incisive cut with the thin knife around the bone to separate it from the ham. This will make it easier to remove the slices in this area. As the bone comes to the surface, this operation must be repeated.
Continue cutting slices from the surface you had and from the new one that appears behind the bone, the tip.
As you continue cutting, the next bone you encounter is the femur. At this point you can make the best use of the ham by turning the knife along the bone. Once this part is finished, it is time to turn the ham over and place it hoof-side down.
CUTTING THE RUMP
This is a narrower and less fatty area, which has thus matured more than the previous one. Clean it much like you did the maza, only here you are going to remove less fat. We recommend ensuring that the slices have a small border of fat on the outside to make them more appetising.
In the upper part, cut the knuckle, a particularly tasty area. The knuckle can be cut into cubes or sliced.
When you uncover the meniscus, use the tip to separate the bone from the ham. This way you will be able to extract new slices perfectly.
Turn the ham over again and continue cutting on the ham hock side. Once you reach the fibula bone, make a deep cut and remove it by levering it out.
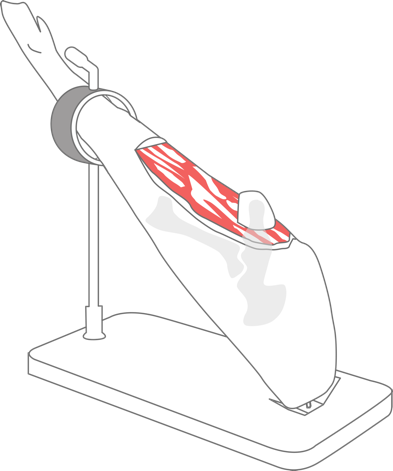

FINISHING THE HAM
Once the piece has been sliced, the most muscular parts can be cut into small cubes and eaten directly or used for cooking.
The leftover fat, which is always white, can also be used to enrich many different dishes. It is a part of the ham that is highly valued by catering professionals.
Finally, although perfectly peeled, the bone is ideal for flavouring stews, casseroles and broths. For this purpose, it is usually cut into medium-sized pieces, which can even be frozen without any problem for future use.
Prevent Joselito Ham from deteriorating
STORE IT AT THE RIGHT TEMPERATURE
Store the ham in a cool, dry place, out of direct sunlight if you are not going to open it for a while. If the ham is to be consumed within a month, it should be stored at approximately 25 °C. If you are going to keep it for a longer period, then it should be stored at a temperature of approximately 15 °C.
Preferably hanging, without touching other surfaces. Remove the paper it arrives wrapped in and hang it up uncovered to allow it to air out.
THE FAT FROM THE HAM ITSELF WILL HELP YOU TO IMPROVE ITS CONSERVATION
Once you start to cut the ham, it is very important to conserve it properly to prevent it from drying out. To do this, use the outer layer of fat that you saved in the first part of the process.
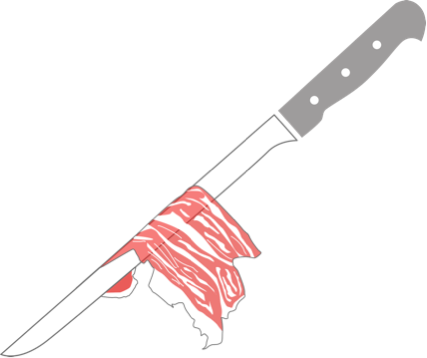
Stick the slices of bacon to the surface of the exposed ham, like a second skin. Then wrap it tightly in cling film. This will prevent contact with the air and the fat will continue to nourish the surface of the ham. Make sure that the entire cutting surface is well covered with bacon.
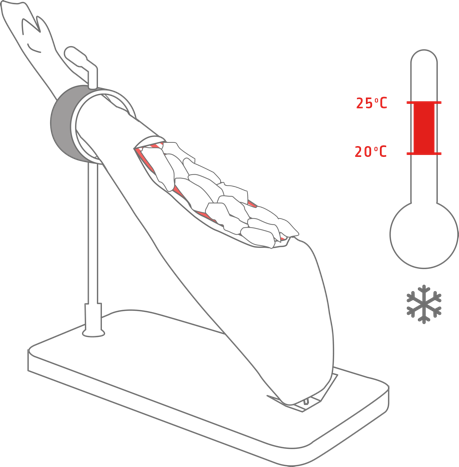
It is essential to avoid prolonged exposure of the ham slices to the air. Always try to cut the amount of ham that you estimate you will consume and just before consumption.
Joselito Ham is a completely natural product with very special qualities, with no additives or preservatives, which is why it needs special treatment and to be kept in suitable conditions of temperature, aeration and humidity.
Let your slice of ham shine

CUTTING HAM WELL MEANS MAKING THE MOST OF IT
Cutting ham is an art that is perfected over time and needs to be done calmly. Enjoy this ritual and carefully follow all the steps in the manual to achieve the maximum exquisiteness of your Joselito Ham.
The slices should be arranged on the plate in such a way as to achieve a certain overlap, which means that they should not be too far apart, but should not be crowded either. The slices should be thin and almost translucent, shiny, aromatic and juicy.
A good cutter also manages to distribute the fat and the lean of Joselito Ham in each slice to provide that unctuousness and excellence that is so characteristic of our ham.
IF HAM IS TO BE CONSUMED IMMEDIATELY
slices from different areas should be combined. This way, you can appreciate and savour the different aromas and nuances hidden in each part of the ham.
Some cuts show white spots, with a chalky consistency and a peculiar flavour, which are the result of prolonged curing and therefore guarantee the maximum quality of the ham. Technically, they are crystallisations resulting from the precipitation of tyrosine, which is an amino acid inherent to the meat caused by the extreme temperature differences that occur naturally in our cellars during the long curing process of Joselito Ham. This is a very good sign and should never be discarded.
